
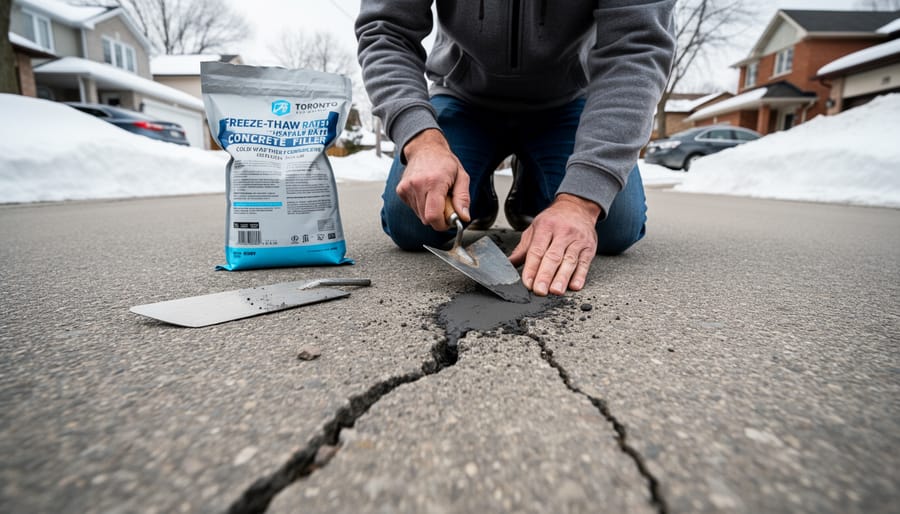
Your driveway can be repaired in a weekend using asphalt patching compound, concrete filler, or crack sealant, depending on the damage type. Most Toronto homeowners can tackle minor cracks, potholes, and surface deterioration themselves with basic tools and $50-$200 in materials. The key is catching damage early, before our harsh freeze-thaw cycles turn a hairline crack into a buckled section that demands professional intervention.
Toronto driveways take a beating. Winter temperatures swing from -15°C to above freezing multiple times per season, forcing water into every tiny fissure where it freezes, expands, and tears the surface apart. Add road salt, heavy snow clearing, and the weight of your vehicle, and you’ve got the perfect recipe for deterioration. Whether you’re looking at an asphalt driveway common in North York or a concrete pad typical of east-end neighborhoods, the damage patterns follow predictable paths that you can intercept before they spiral out of control.
This guide walks you through identifying what’s actually wrong with your driveway, gathering the right materials from local suppliers, and executing repairs that will survive another Toronto winter. You’ll learn which cracks need immediate attention, which can wait, and when to admit that the damage has progressed beyond a DIY fix. The techniques covered here draw from proven Toronto home care practices adapted for our climate, with timing recommendations that account for our short construction season and material specs that handle temperature extremes. These same principles apply to driveway repair mississauga and throughout the GTA region.
Assessing Your Driveway Damage
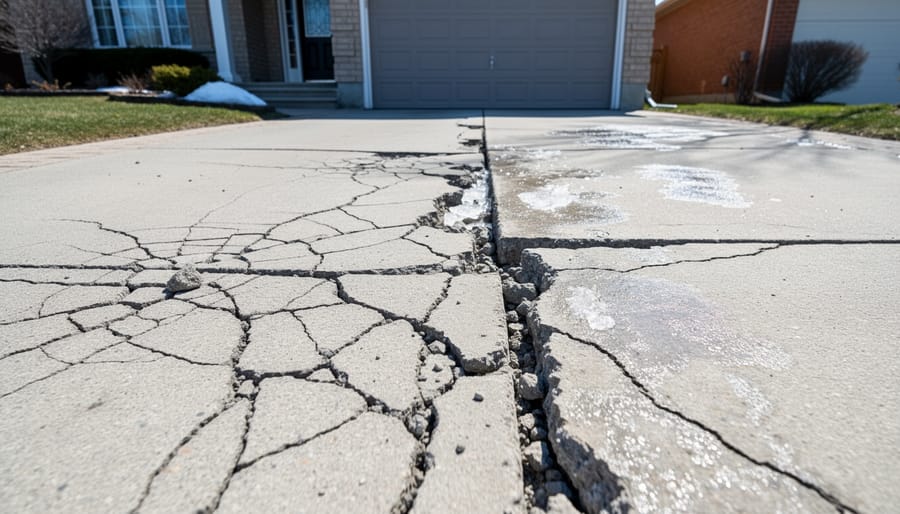
Start your assessment by walking the entire driveway during dry conditions with good lighting. Look for visible damage and feel for surface irregularities with your feet. Toronto’s freeze-thaw cycles create predictable patterns of deterioration that you can spot with a systematic inspection.
Common damage types fall into distinct categories, each signaling different severity levels:
- Hairline cracks (less than 1/8 inch wide): surface-level damage, typically easy DIY fixes
- Wide cracks (more than 1/4 inch): deeper structural issues requiring more substantial repair
- Potholes: complete surface breakdown exposing base material, moderate DIY repair
- Alligator cracking: interconnected cracks forming a web pattern, often indicates base failure
- Sunken areas: settled sections creating depressions, may signal drainage or base problems
- Edge crumbling: deteriorating perimeter material, common along borders and often progressive
Pay attention to the pattern and location of damage. Isolated cracks near the street or along one edge often result from water infiltration and are manageable repairs. Widespread cracking across the entire surface, especially the alligator pattern, suggests base deterioration that might need professional intervention.
Check for active movement by marking crack edges with chalk and monitoring over a few weeks. Cracks that continue widening indicate ongoing structural issues. Test sunken areas by standing on them, if they feel spongy or shift under weight, the base material has failed and you’re looking at more than a simple surface repair.
Call a professional if you find extensive alligator cracking covering more than 30% of the surface, multiple deep potholes concentrated in one area, or significant heaving that has created height differences exceeding two inches. These conditions often require excavation and base reconstruction beyond typical DIY scope. Similarly, if your driveway shows signs of subsidence near your home’s foundation or connects to drainage issues, get a professional assessment before attempting repairs.
For most Toronto homeowners, individual cracks under half an inch wide, isolated potholes, and minor edge deterioration are well within DIY capability with proper materials and technique.
Tools and Materials You’ll Need
Gathering the right tools and materials before you start will save multiple trips to the store and ensure your repair goes smoothly. Here’s what you’ll need for the most common Toronto driveway repairs.
For Asphalt Repairs
Cold-patch asphalt compound (around $25-40 for a 23 kg bag at Home Depot or Rona), asphalt crack filler or rubberized sealant ($15-30 per tube), and asphalt sealer if you’re refinishing ($35-60 for a 19-litre pail). You’ll also need a tamper or hand compactor ($30-50), a stiff push broom, and a caulking gun for applying crack filler. A propane torch helps prepare larger cracks, though it’s optional for small repairs.
For Concrete Repairs
Concrete patching compound or quick-setting mix ($12-25 per bag), concrete bonding adhesive ($15-25), and concrete crack filler for narrow cracks ($8-15). Grab a margin trowel and finishing trowel (around $10-20 each), a wire brush for cleaning, and a spray bottle for keeping the patch moist during curing. Latex gloves and safety glasses are essential.
For Interlocking Paver Repairs
Polymeric sand ($20-35 per bag) to refill joints, leveling sand or screenings ($5-10 per bag), and a rubber mallet ($15-25). You’ll need a flat pry bar or brick tongs to lift pavers, a hand tamper, and a push broom. If you’re replacing damaged pavers, bring a sample to suppliers like Unilock or Oaks Landscape Products in the GTA to match your existing pattern.
Universal Tools
Every repair needs a square-point shovel, safety glasses, work gloves, a measuring tape, and a garden hose with spray nozzle. A shop vacuum speeds up cleaning considerably.
Most materials are available at Home Depot, Lowes, or Canadian Tire locations across Toronto. For specialty items or bulk supplies, check Regal Building Materials or local masonry suppliers.
Safety Precautions and Weather Considerations
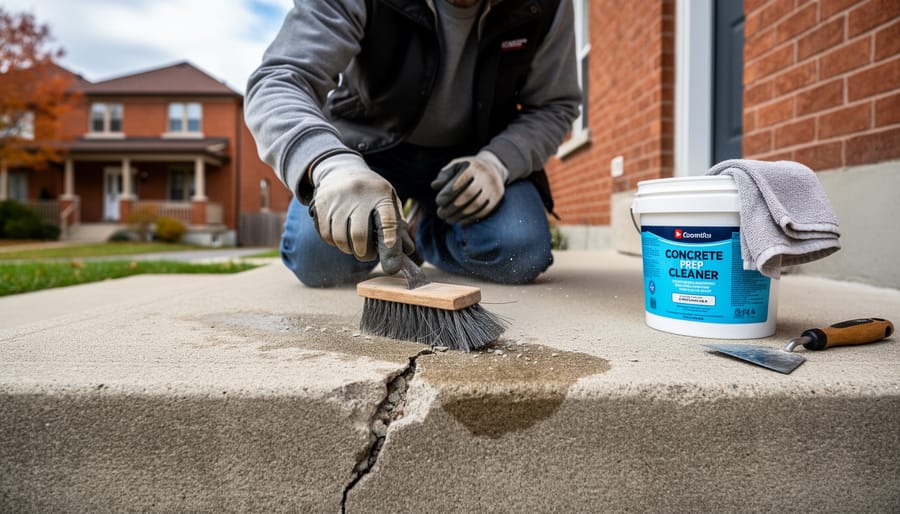
Before you start mixing materials or breaking up damaged sections, take a few minutes to protect yourself and check the weather forecast. Driveway repair involves physical strain, caustic chemicals, and in some cases, extremely hot materials that can cause serious burns or respiratory issues if you’re not careful.
Wear heavy-duty work gloves when handling concrete or asphalt products, both can irritate or burn skin on contact. Safety glasses are non-negotiable, especially when chipping out old concrete or cutting pavers, since debris flies unpredictably. If you’re working with sealers or asphalt primers, use a respirator mask rated for organic vapors, not just a dust mask. These products release fumes that can quickly overwhelm you in still air, so work in open, well-ventilated conditions and avoid enclosed garages.
Hot asphalt patch material can reach temperatures above 150°C. Use a long-handled tamper or compactor to avoid getting near the surface, and never attempt to smooth it with your hands or feet. When lifting bags of concrete mix, sand, or broken chunks of old driveway, bend at the knees and keep the weight close to your body. A 30-kilogram bag of patch compound doesn’t feel heavy until you’ve moved six of them and your lower back seizes up the next morning.
Toronto’s climate creates a narrow window for successful driveway work. Late May through early September offers the most reliable conditions, with consistent warmth and lower humidity. Concrete and asphalt both need temperatures above 10°C to cure correctly, and ideally you want several consecutive days in that range. Check the extended forecast before buying materials, an unexpected cold snap or heavy rain can waste your effort and money. High humidity slows curing time for concrete repairs, so aim for drier periods when possible, though Toronto’s summer humidity is rarely low enough to cause major problems if you follow proper curing practices.
Step-by-Step Repair Process
Repairing Asphalt Cracks and Potholes
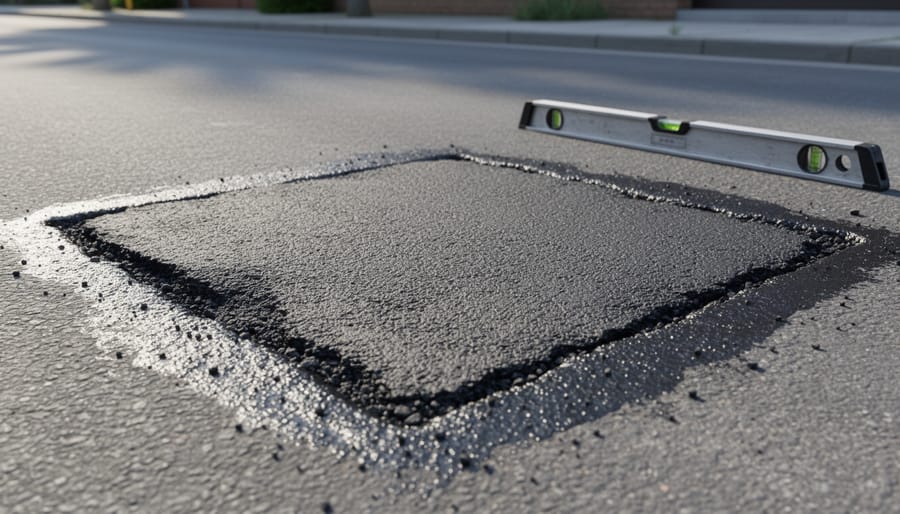
Asphalt repair works best when you follow a methodical process. The key is thorough preparation, which makes the difference between a patch that lasts one season versus several years in Toronto’s punishing climate.
Start by examining the damage closely. Cracks wider than a quarter-inch and potholes of any size need immediate attention before winter arrives. Use a wire brush or pressure washer to remove all loose debris, dirt, and vegetation from the damaged area. For potholes, you’ll need to chip away any crumbling edges until you reach solid asphalt. This step feels tedious, but skip it and your patch won’t bond properly.
- Clean the crack or pothole thoroughly with a wire brush, then blow out all dust and loose particles with a leaf blower or air compressor.
- For cracks deeper than half an inch, apply asphalt primer to the cleaned surface and let it dry for 10-15 minutes until tacky.
- Fill the damaged area with cold-patch asphalt compound, slightly overfilling to account for compaction. For potholes deeper than two inches, fill in layers rather than all at once.
- Compact the patch using a hand tamper for small repairs or drive your vehicle’s tire over it repeatedly for larger areas. The asphalt should sit level with the surrounding surface when properly compacted.
- For cracks, use a squeegee or putty knife to force crack filler deep into the gap, then smooth the surface flush with the driveway.
- Allow the repair to cure for at least 24 hours before regular use, longer if temperatures are below 15°C.
Toronto’s asphalt driveways often have that slight crown in the middle for water drainage. When patching, maintain this slope rather than creating flat spots where water can pool and freeze. Cold-patch asphalt works year-round and stays workable in cooler temperatures, making it ideal for our spring and fall repair windows. Hot asphalt gives a more permanent fix but requires warmer weather and proper heating equipment.
For edge repairs where the asphalt meets your lawn, compact extra firmly. These spots take the most abuse from snowplows and freeze-thaw cycles. Some homeowners add a border of gravel or install edge restraints to prevent future crumbling.
Fixing Concrete Cracks and Surface Damage
Concrete driveways take a beating in Toronto’s climate, with temperature swings causing the material to expand and contract throughout the year. The good news is that small to medium cracks and surface damage respond well to proper patching when you follow the right sequence.
Start by examining the crack carefully. Use a cold chisel and hammer to widen narrow cracks to at least 1/4 inch, this seems counterintuitive, but it creates a better surface for the patch material to grip. Undercut the edges slightly so the crack is wider at the bottom than the top, which prevents the patch from popping out. Remove all loose concrete, dirt, and debris with a wire brush, then vacuum or blow out the dust completely. Any residue will prevent proper bonding.
For cracks deeper than 1/2 inch, you’ll need to work in layers rather than filling everything at once. Apply a concrete bonding agent to all surfaces that will contact the patch, brush it on generously and let it become tacky according to the product instructions, usually 15-30 minutes in Toronto’s typical humidity.
- Mix the concrete patch compound to a thick peanut butter consistency, using approximately 4 parts mix to 1 part water, adding water gradually.
- Pack the mixture firmly into the crack with a pointed trowel, working from the bottom up and eliminating air pockets.
- Overfill slightly, as the compound will shrink as it cures.
- Smooth the surface with a finishing trowel, feathering the edges to blend with the surrounding concrete.
- Match the existing texture using a broom, sponge, or brush while the patch is still workable.
- Cover the repair with plastic sheeting and mist it daily for at least three days to ensure proper curing.
Toronto’s concrete challenges include scaling from de-icing salt exposure and pop-outs from freeze-thaw action. For surface damage like these, use a concrete resurfacer instead of standard patch compound. Apply it with a long-handled squeegee in thin coats, working quickly before it sets.
Temperature matters enormously for concrete work. Never patch when temperatures will drop below 10°C within 24 hours, and avoid working in direct summer sun above 30°C, which causes too-rapid drying. Early morning application in spring or fall gives you the best conditions. The patch needs at least 48 hours before vehicle traffic, and a full week before applying any sealant.
Resetting Interlocking Pavers
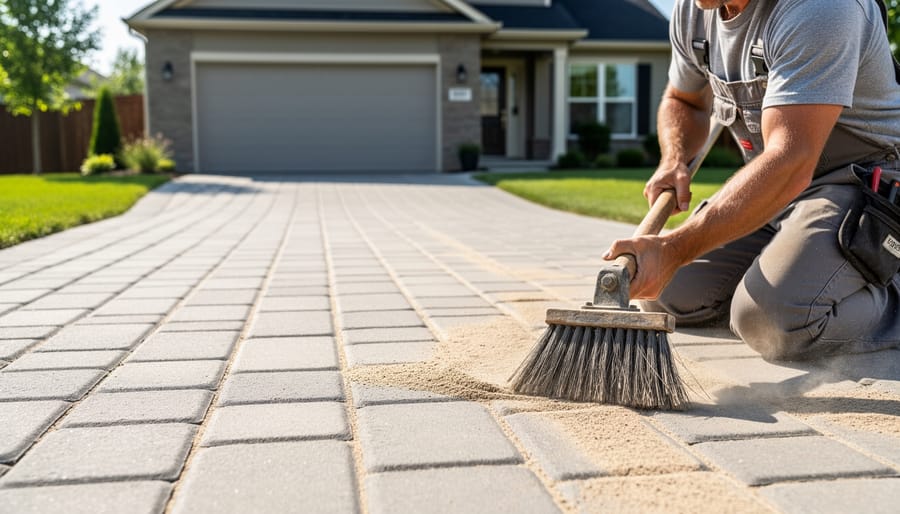
Interlocking pavers sink or shift primarily due to base material washing out beneath them, a frequent issue in Toronto driveways where snowmelt and spring runoff erode the sand bed. Frost heave also pushes pavers up unevenly during winter, leaving high spots that settle back irregularly. The good news: resetting pavers is straightforward and doesn’t require special equipment beyond basic hand tools.
- Remove the affected pavers carefully using a flathead screwdriver and pry bar, working from the center of the problem area outward. Stack them nearby in the order you removed them to maintain any established pattern.
- Excavate the bedding sand beneath, checking the base layer (usually compacted gravel) for voids or loose spots. If the base has eroded or settled more than half an inch, you’ll need to remove enough to add fresh material.
- Add and compact the base layer if needed, using three-quarter-inch clear stone. Tamp it firmly with a hand tamper until no further settling occurs when you apply pressure.
- Spread new bedding sand (concrete sand works well in Toronto’s climate) to about one inch depth, then level it with a straight board or screed. The sand should sit slightly higher than needed since it will compact.
- Reinstall the pavers, starting from a straight edge and working outward. Set each one firmly but don’t force them, they should drop about a quarter-inch into the sand bed when tapped with a rubber mallet.
- Fill the joints by sweeping polymeric sand across the surface, making multiple passes until joints are full to within an eighth-inch of the top.
- Compact the entire repaired section with a plate compactor (rentable from tool shops) or hand tamper for small areas, then sweep in more joint sand as needed.
Check your edge restraints while you’re at it. Loose or missing edge blocks let pavers creep outward over time, especially along driveway borders where cars apply lateral force. Replace any damaged restraint pieces and secure them with landscape spikes driven into firm soil.
Sealing and Protecting Your Repaired Driveway
A fresh repair needs protection to survive Toronto’s brutal winters. Sealing shields the surface from water infiltration, freeze-thaw damage, and de-icing salts that shorten driveway life in the GTA.
For asphalt driveways, wait 6-12 months after new installation before sealing, but you can seal repairs immediately once they’ve cured for 24-48 hours. Choose a coal tar or asphalt-based sealer rated for Canadian climates. Apply when temperatures will stay above 10°C for 48 hours and no rain is forecast. Clean the surface thoroughly, then use a squeegee or brush to spread sealer in thin, even coats. Two coats provide better protection than one thick application.
Concrete repairs need different care. Wait at least 30 days after patching before applying a penetrating silane or siloxane sealer, which works better than film-forming types in freeze-thaw conditions. These sealers soak into the concrete rather than sitting on top, letting moisture escape while blocking water entry.
Reapply asphalt sealer every 2-3 years and concrete sealer every 3-5 years, depending on traffic and weather exposure. This maintenance boost curb appeal while extending your driveway’s lifespan.
For winter protection, keep your driveway clear of snow buildup and use sand or kitty litter for traction instead of rock salt when possible. If you must use de-icer, choose calcium magnesium acetate, which causes less damage than sodium chloride. Avoid metal shovels and plows that can chip fresh repairs.
Verifying Your Repair and Next Steps
Once your repair has cured for the recommended time (typically 24-72 hours depending on material and temperature), walk the entire repaired area and conduct a thorough inspection. Start by checking the surface level: run your hand across the transition between old and new material to feel for ridges or depressions that could catch snow shovels or create trip hazards. Pour a bucket of water over the repaired section and watch how it drains, pooling water signals an improper grade that will freeze and cause new damage during Toronto’s winter months.
Quality indicators of a successful repair include:
- No visible gaps or separation between patch material and existing driveway
- Water flows away from the repair toward proper drainage points
- Smooth transitions with no raised edges or sunken spots
- Stable perimeter with no crumbling or loose material at repair boundaries
- Patch material has hardened to match surrounding surface firmness
Test edge stability by applying gentle pressure with your foot along the repair perimeter. Loose edges indicate inadequate compaction or insufficient base preparation. For asphalt repairs, the patch should feel firm but not brittle; for concrete, tap it gently, a solid sound confirms proper curing.
Monitor your repair through Toronto’s seasonal shifts, particularly after the first freeze-thaw cycle and spring melt. Small hairline cracks within the first year are normal settling, but widening gaps, recurring potholes, or water infiltration mean the repair has failed. Most quality repairs last 3-5 years in Toronto neighborhoods before requiring touch-ups. If you notice extensive cracking across multiple areas, significant settling (more than 2 cm), or drainage problems affecting your foundation, schedule a professional assessment, these signal underlying base issues that DIY surface repairs cannot address.
Common Mistakes to Avoid
Toronto’s freeze-thaw climate turns minor repair mistakes into major failures. The most common error is working during inappropriate weather. Many homeowners rush to patch their driveways when temperatures hover around 5°C, but most patching compounds and sealers require sustained temperatures above 10-15°C for proper bonding and curing. Applying repairs just before an overnight frost causes the material to fail before it even sets. Similarly, working during humid or rainy conditions prevents proper adhesion and can dilute patching compounds.
Inadequate surface preparation undermines even high-quality materials. Skipping the cleaning step or leaving dust, oil, and loose debris in cracks prevents the new material from bonding to the old surface. The repair might look fine initially, but it will pop out during the first winter freeze. For asphalt repairs, failing to compact the patch material properly creates air pockets that allow water infiltration and accelerate deterioration.
Using materials not designed for Canadian winters is surprisingly common. Budget cold-patch compounds without polymer modifiers crack quickly in GTA temperature swings. Concrete mixes without air-entraining agents spall within months of exposure to road salt and freeze-thaw cycles. The small savings on materials costs you far more in repeated repairs.
Ignoring underlying drainage problems guarantees your repair will fail in the same spot. Water pooling on your driveway signals grade issues or blocked drainage that must be addressed before patching. Rushing the curing process by driving on fresh repairs too soon or sealing before the patch fully sets compromises the bond and wastes your effort.
Frequently Asked Questions
When’s the best time to repair my driveway in Toronto?
Tackle repairs between late April and early October when temperatures consistently stay above 10°C. Avoid working during freeze risk periods or when rain is forecast within 24 hours, as proper curing requires stable, dry conditions.
How long will my DIY repair actually last?
Well-executed asphalt crack fills typically hold for 3-5 years, while concrete patches can last 5-8 years if applied correctly. Lifespan depends heavily on preparation quality and whether you address underlying drainage issues that caused the original damage.
Will I really save money doing it myself versus hiring a pro?
For small repairs under 10 square feet, you’ll save 60-75% by going DIY, spending $50-150 on materials versus $300-600 for professional work. Larger projects or complex damage often justify professional help since mistakes can cost more to fix than the original repair.
Do I need a permit to repair my Toronto driveway?
Simple repairs like filling cracks or patching potholes don’t require permits. You’ll need one if you’re replacing more than 50% of the driveway surface or changing its footprint, which falls under GTA housing insight and property improvement regulations.
What if the same spot keeps cracking every winter?
Recurring damage signals an underlying problem, usually poor drainage or base settlement. You’ll need to address the root cause by improving slope, adding drainage, or rebuilding the base layer rather than repeatedly patching the surface.
Are there warranties on DIY repair materials?
Most quality patching compounds and sealers come with manufacturer warranties of 1-3 years, but they only cover product defects, not application errors. Save your receipts and follow product instructions exactly to maintain coverage.
Understanding these common concerns helps you approach your driveway repair with realistic expectations. Toronto’s climate makes timing crucial, and knowing when to call in help versus handling repairs yourself saves both money and frustration. Proper local maintenance habits extend the life of any repair you complete, particularly if you inspect twice yearly and address small issues before they grow.
With the right preparation and materials, most Toronto driveway repairs fall well within the DIY skillset of motivated homeowners. You’ve now got the knowledge to assess damage accurately, choose appropriate materials, and execute repairs that will hold up through our demanding climate.
The key to long-term success lies in timing and prevention. Address cracks and minor damage as soon as you spot them, ideally in late spring or early fall when temperatures cooperate. What starts as a hairline crack in April can become a pothole by December once freeze-thaw cycles get to work. Early intervention saves both money and effort.
Start with a thorough assessment of your driveway’s condition. Identify all problem areas, measure the extent of damage, and decide which repairs you can confidently handle this season. Most surface cracks, small potholes, and sunken pavers respond well to DIY fixes when you follow proper techniques and allow adequate curing time.
That said, recognize when a project exceeds DIY scope. Extensive structural damage, drainage problems affecting your foundation, or repairs requiring specialized equipment warrant professional assessment. Sometimes calling in experts for complex work while maintaining simpler repairs yourself strikes the best balance for your driveway’s longevity and your budget.